Riji which means diary in Chinese is a simple blog tool using Markdown and Git.
Background
I was looking at Text::Xslate and its dependencies. That's how I bumped into Riji
The current release is version 0.0.11 and Masayuki Matsuki, the author says it is not ready yet. But when did that stop us from trying something?
Riji can be also found on GitHub with and additional README and there is a Riji tutorial, in Japanese.
I tried the following on OSX, but I believe it should work the same on any Linux system as well.
Installation of Riji
If you don't have it yet, install CPAN Minus.
Then install Riji using cpanm Riji.
You will also have to have a git client installed.
Setup diary
You have to be in an empty directory in order to get started so I created one:
$ mkdir riji-diary
$ cd riji-diary
$ riji setup

Initialized empty Git repository in /Users/gabor/tmp/diary/.git/
[master (root-commit) 1bc574d] initial blog commit
 10 files changed, 163 insertions(+)
 create mode 100644 README.md
 create mode 100644 article/archives.md
 create mode 100644 article/entry/sample.md
 create mode 100644 article/index.md
 create mode 100644 riji.yml
 create mode 100644 share/tmpl/base.tx
 create mode 100644 share/tmpl/default.tx
 create mode 100644 share/tmpl/entry.tx
 create mode 100644 share/tmpl/index.tx
 create mode 100644 share/tmpl/tag.tx
The riji setup command created the directory structure and already
ran git init . on my behalf, and even committed the first
changes.
If you'd like to see the directly layout in a nicer way, run tree:
$ tree
.
├── README.md
├── article
│   ├── archives.md
│   ├── entry
│   │   └── sample.md
│   └── index.md
├── riji.yml
└── share
    └── tmpl
        ├── base.tx
        ├── default.tx
        ├── entry.tx
        ├── index.tx
        └── tag.tx

4 directories, 10 files
Riji is mostly for using via GitHub Pages, but
it comes with a small built-in web-server to make the development faster.
To start the server type riji server -L Shotgun:
(You could get away with just riji server as well,
but using the Shotgun
will make sure the files are reloaded when you change them.)
$ riji server -L Shotgun
Watching  for file updates.
HTTP::Server::PSGI: Accepting connections at http://0:3650/
Then use your browser to access port 3650 on your machine:
Directory structure and files of Riji
In the root directory there is a configuration file called riji.yml.
The article directory contains the source of the articles.
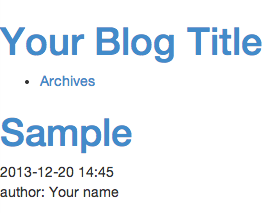
For example the default sample page you can see is served from
article/entry/sample.md
Editing an article
The file article/entry/sample.md has the following content:
# Sample
Let's edit the file. Let's change it to
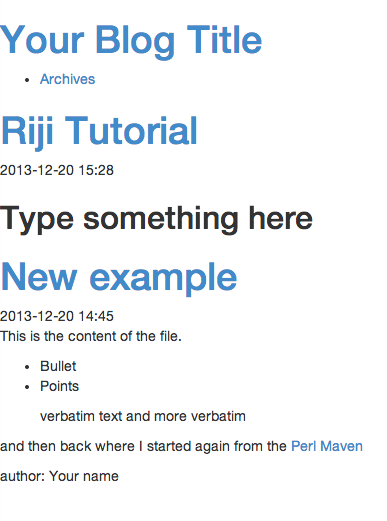
# New example
After editing the file you can reloaded the page in your browser. If you used the Shotgun as recommended above, you'll see the word Sample was replaced by New example.
You can now go ahead and type in more text using the Markdown syntax.
For example type this:
# New example

This is the content of the file.

* Bullet
* Points

    verbatim text
    and more verbatim

and then back where I started again from
the [Perl Maven](https://perlmaven.com)
and then reload the page in your browser
Second page
Create a new file in the article/entry/ directory:
(e.g. article/entry/tutorial.md ) and put the following
in the file:
# Riji Tutorial

Type something here
-------------------
After reloading the browser you'll see the following:
Individual pages
Besides having a main page with the content of the articles, Riji also provides the pages on their individual URLS. For example, the new tutorial page can also be accessed as /entry/tutorial.html on your machine.
Atom instead of RSS feed
Riji automatically generates an Atom feed for the site. It can be accessed as /atom.xml on your computer.
Configuration
As you can see the title of the site is Your Blog Title and
author is marked as Your name. These values come from the
riji.yml
author:   'Your name'
title:    "Your Blog Title"
site_url: 'http://yourblog.example.com/'
I changed it to:
author:   'Gabor Szabo'
title:    "Perl Maven Riji tutorial"
site_url: 'http://yourblog.example.com/'
Reloading the page in the browser did not show the changes. Apparently the Shotgun does not monitor that file.
I had to stop the server using Ctr-C in the console where it runs, and started it again with the same options.
After reloading the page in the browser it shows the new title and new author. The site_url is used in the atom feed only.
Add to git
If we go back to the command line and type git status now,
we'll see that two files have changed and there is a new untracked
file:
$ git status

# On branch master
# Changes not staged for commit:
#   (use "git add <file>..." to update what will be committed)
#   (use "git checkout -- <file>..." to discard changes in working directory)
#
#   modified:   article/entry/sample.md
#   modified:   riji.yml
#
# Untracked files:
#   (use "git add <file>..." to include in what will be committed)
#
#   article/entry/tutorial.md
no changes added to commit (use "git add" and/or "git commit -a")
As Git also suggests we can now type git add . to stage
all the files, and the we can commit them by typing
git commit -m "add tutorial"
Publish
While you can run Riji using Startman, or some other PSGI-server, but you can also generate static pages, upload them to some free server like the GitHub Pages. In another article you can find explanation how to use GitHub pages.
Let's see what did I do:
riji publish generates the static pages in the blog/ subdirectory.
This can be used, or you can add
publish_dir: .
to the riji.yml file and then the files will be generated in the root directory
of your repository.
Instead of that I put
publish_dir: 'blog'
just to say explicitly where I want the files to go.
Once the files were generated, I add them to git:
git add .
git commit -m "add published files"
Created a GitHub repository called riji-diary and followed the instructions of the help site.
The result is here.
